I can't believe what a difference 0.5 cm can make. I adjusted the so-called bowden cable that adjusts the transmission's shift points. Well actually, it adjusts how soon the transmission shifts when you have the throttle pedal at X %.
It used to hold third gear almost infinitely unless I almost released the throttle. Also on second I had to be very careful if I wanted to shift early. Early shifting is necessary to achieve any kind of fuel economy and I've got enough low end torque to use the higher gears.
After the adjustment, the transmission works like a dream. I can apply something like half throttle and I still get shifts at about 2k rpm. I can go full throttle and the trans will apply low-end torque without kicking down. The kickdown switch still works of course.
It feels like I just had a transmission job. I used to shift with feathering the throttle. This put slack in the powertrain so gears went in with a clunk. Now, with power on, it shifts smooth but fast. I still need to get rid of that slack, though.
This all made a difference in drivability too, since in leaving intersections, I can now just keep my foot in it and it'll shift.
For information on how to do this on your W126, see this thread on BenzWorld.
Jul 14, 2012

Jun 28, 2012
Situation Normal
I now have the new spark plug lead so that's one problem sorted.
Here's a clip of the rain repellant working its magic:
This is my first foray into the world of 5sateesta. It's a revelation. I'd kinda thought of it as snake oil, but not any more.
Just spraying water in the air with a hose, letting it rain onto the windshield... on an untreated windshield, it pooled to form a thick layer of water that only slowly drifted downwards and off the glass. After applying the stuff, the beads of water literally run off the glass as fast as they possibly can. There's never more water on the glass than exits the hose at any given moment. When you shut the hose, the windshield is basically immediately dry again. It's miraculous.
On another topic, here's another virtual cruise, with a considerably better recording of the exhaust. I had one phone recording in the usual place, under the passenger side headrest. Another phone, in the trunk, had a handsfree kit attached and the mike taped next to the rear license plate. I combined the video and the audio in software and this is the result.
Here's a clip of the rain repellant working its magic:
This is my first foray into the world of 5sateesta. It's a revelation. I'd kinda thought of it as snake oil, but not any more.
Just spraying water in the air with a hose, letting it rain onto the windshield... on an untreated windshield, it pooled to form a thick layer of water that only slowly drifted downwards and off the glass. After applying the stuff, the beads of water literally run off the glass as fast as they possibly can. There's never more water on the glass than exits the hose at any given moment. When you shut the hose, the windshield is basically immediately dry again. It's miraculous.
On another topic, here's another virtual cruise, with a considerably better recording of the exhaust. I had one phone recording in the usual place, under the passenger side headrest. Another phone, in the trunk, had a handsfree kit attached and the mike taped next to the rear license plate. I combined the video and the audio in software and this is the result.
Broken Ignition Lead - The Explanation
Bosch replied and said they can't comment by a photo over e-mail. Told me to go to a local dealer.
Dealer looked at the photo, got curious, and had a quick look at the lead IRL. Said they had seen numerous leads break and this was not how it happens. Said this must be an inproper installation - grabbing the lead by the neck with pliers, and then it says snap-crackle-pop. This all makes sense now, as it was an intern at the shop who changed the spark plugs three months ago.
Well, Bosch still wants to replace the #4 lead no-charge.
In other news, today I claybared the windshield and gave it a 5sateesta treatment (rain repellant). Also fitted new wiper blades. Ah, that feeling when cheapo Biltema wiper blades fit no problem and work great. Can't beat an 8 eur set - no big deal to swap brand new blades every 3 months.
Dealer looked at the photo, got curious, and had a quick look at the lead IRL. Said they had seen numerous leads break and this was not how it happens. Said this must be an inproper installation - grabbing the lead by the neck with pliers, and then it says snap-crackle-pop. This all makes sense now, as it was an intern at the shop who changed the spark plugs three months ago.
Well, Bosch still wants to replace the #4 lead no-charge.
In other news, today I claybared the windshield and gave it a 5sateesta treatment (rain repellant). Also fitted new wiper blades. Ah, that feeling when cheapo Biltema wiper blades fit no problem and work great. Can't beat an 8 eur set - no big deal to swap brand new blades every 3 months.
Jun 20, 2012
More Broken Bits
Today, as I was messing around in the engine compartment, completely by conincidence I laid my eyes on the #4 cylinder spark plug lead:

W.T.F.?
It's barely 1,5 years old and has done 14 000 km. And it's Bosch OEM.
W.T.F.?
It's barely 1,5 years old and has done 14 000 km. And it's Bosch OEM.
Jun 16, 2012
MB Club Picnic Drive to Asikkala
Today was a perfect day. Sunny and calm, not too hot. I was invited to the M-B Club's main summer event, a picnic cruise in Asikkala, near Lahti. I left at about 10:30am, massively late, not least because I had to refuel before really getting underway.
In Kouvola, contrary to Google Maps' suggestion, I didn't take the highway to Lahti, electing to drive the 363 which runs north of the highway, through some tiny villages.
As it turns out, this was one of my better ideas of... the year. The road was simply mindblowing. It's one of those roads you can't really appreciate until you're there, thundering down a twisty hilly backroad where you can barely pass another vehicle. No one was there, except those who also drove it for the pure enjoyment of it. Every so often, a village came up, and they were buzzing with tourists and life. As you drive through the forests and fields, in the distance you could see the terrain was spotted with lakes and hills. Once in a while, you got the glimmer of the sun in the surrounding water.
Screaming down that road was one of those motoring moments that sink deep into your subconcious, never ever to wear off. It was spine-tingling, sweat-dripping, armhair-raising, perfection. It was brilliant.
In Asikkala, turnout was great, due to the sunny and so far dry weather. There was the usual assortment of sedans and coupes, new and old, 124 convertibles, 107 roadsters, a couple of really old cars, and a couple of really new cars also. One of those was a CLS 63 AMG driven by my good friend Kari.

Turnout was good enough that we could get nowhere near all the cars to fit in the yard!
In the schedule was an actual picnic at a nearby canal park. After that, a visit to an aviation museum a couple of km's away. All in all the actual meetup was over way too fast, it only went for about 3 or 4 hours.
As I was leaving I figured I was so early I might as well take my time. I again drove the country road and made three stops along the way. One was the UNESCO World Heritage site of the old Verla cardboard factory. To be honest I didn't think much of it. I can see the allure, it's a nice-looking countryside location with a nicely restored industrial complex from the 1800s. However, these days it was mostly a tourist trap with pins, stickers and pizza. Not really my thing.
A lot more interesting was this old... thing I found:


As you can see it's a canal lock, or today technically a dam. Except it has a giant lift above it. This makes it a wood lift; a device for transferring wood from the canal to industrial use nearby. The downstream side flowed into a cavern.
This was the most Half-Life 2 vibey place I had ever been to. Deep inside the bowels of the structure, on the cavern entrance it even had the little hut with a beat-up mattress inside:
Before getting off the 363, I just had to stop once more and snap a memento of it:

In Kouvola, contrary to Google Maps' suggestion, I didn't take the highway to Lahti, electing to drive the 363 which runs north of the highway, through some tiny villages.
As it turns out, this was one of my better ideas of... the year. The road was simply mindblowing. It's one of those roads you can't really appreciate until you're there, thundering down a twisty hilly backroad where you can barely pass another vehicle. No one was there, except those who also drove it for the pure enjoyment of it. Every so often, a village came up, and they were buzzing with tourists and life. As you drive through the forests and fields, in the distance you could see the terrain was spotted with lakes and hills. Once in a while, you got the glimmer of the sun in the surrounding water.
Screaming down that road was one of those motoring moments that sink deep into your subconcious, never ever to wear off. It was spine-tingling, sweat-dripping, armhair-raising, perfection. It was brilliant.
In Asikkala, turnout was great, due to the sunny and so far dry weather. There was the usual assortment of sedans and coupes, new and old, 124 convertibles, 107 roadsters, a couple of really old cars, and a couple of really new cars also. One of those was a CLS 63 AMG driven by my good friend Kari.
Turnout was good enough that we could get nowhere near all the cars to fit in the yard!
In the schedule was an actual picnic at a nearby canal park. After that, a visit to an aviation museum a couple of km's away. All in all the actual meetup was over way too fast, it only went for about 3 or 4 hours.
As I was leaving I figured I was so early I might as well take my time. I again drove the country road and made three stops along the way. One was the UNESCO World Heritage site of the old Verla cardboard factory. To be honest I didn't think much of it. I can see the allure, it's a nice-looking countryside location with a nicely restored industrial complex from the 1800s. However, these days it was mostly a tourist trap with pins, stickers and pizza. Not really my thing.
A lot more interesting was this old... thing I found:
As you can see it's a canal lock, or today technically a dam. Except it has a giant lift above it. This makes it a wood lift; a device for transferring wood from the canal to industrial use nearby. The downstream side flowed into a cavern.
This was the most Half-Life 2 vibey place I had ever been to. Deep inside the bowels of the structure, on the cavern entrance it even had the little hut with a beat-up mattress inside:
 |
| The only thing missing was the .357 Magnum and a dude with a crab over his head. |
Before getting off the 363, I just had to stop once more and snap a memento of it:
May 16, 2012
Spring Cleaning 2012, Part III
I have now concluded the main cleanup effort. Altogether I spent 7 days doing it (on and off).
In addition to treating the leather, I spent some time making the headliner appear a little cleaner. It was probably the most beaten looking part of the interior.

It looked so terrible, in 2011 I took the car to professional interior cleanup. I recall paying about 80 EUR and above is what it got me. It was probably the worst ripoff I've had done on me.
Anyway, I used Autoglym Interior Shampoo again with a clean cloth, rinsing in a bucket of water.


Note, the flash makes it look worse than it does IRL. However it does reveal that there's still work to be done. However, for a first attempt that is pretty good, and a bargain, compared to the pro.
Having cleaned up the interior somewhat it was time to move onto the outside.
For the roof, trunklid and A/C pillars I used just my usual set of Big Orange shampoo and Korrek TFX wax. For all other paint, I added claybaring (Sonax). I used Sonax' window shampoo as a lube. After washing, washing and washing the clay still picked up A LOT of dirt, so it did its job.
It's nice having a shiny car again!

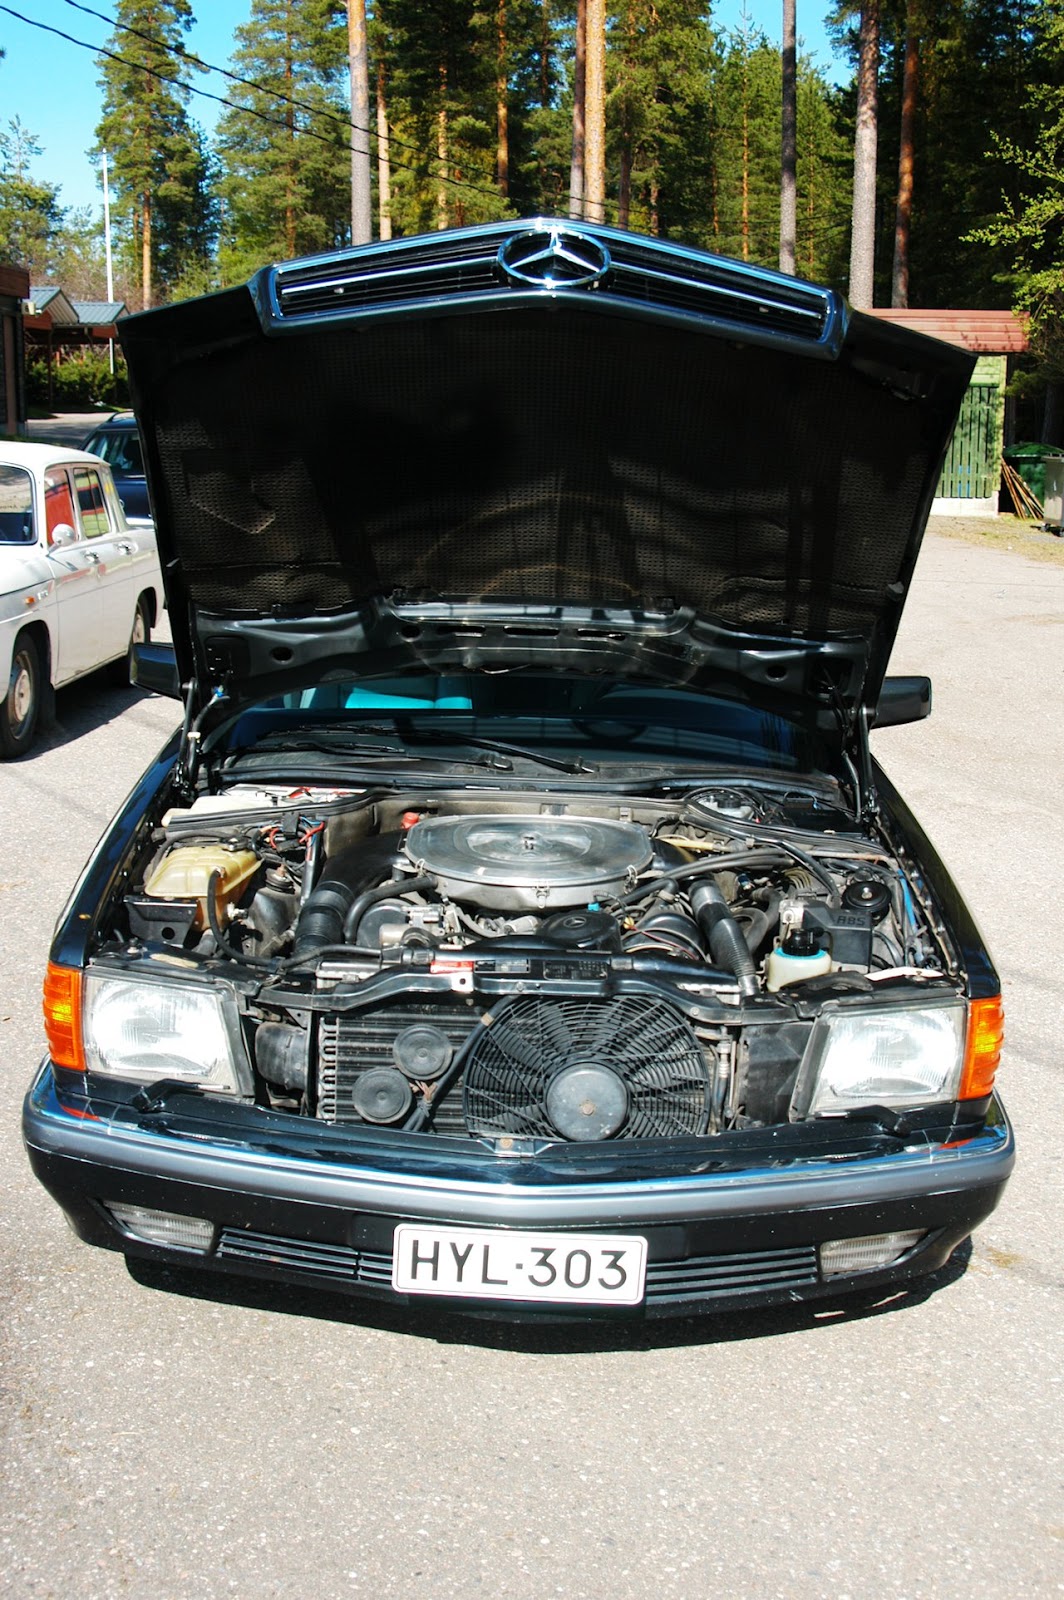
The hood is especially nice! It has a few stone chips but other than that, it looks great, with the new grille and emblem.


In addition to treating the leather, I spent some time making the headliner appear a little cleaner. It was probably the most beaten looking part of the interior.
It looked so terrible, in 2011 I took the car to professional interior cleanup. I recall paying about 80 EUR and above is what it got me. It was probably the worst ripoff I've had done on me.
Anyway, I used Autoglym Interior Shampoo again with a clean cloth, rinsing in a bucket of water.
Note, the flash makes it look worse than it does IRL. However it does reveal that there's still work to be done. However, for a first attempt that is pretty good, and a bargain, compared to the pro.
Having cleaned up the interior somewhat it was time to move onto the outside.
For the roof, trunklid and A/C pillars I used just my usual set of Big Orange shampoo and Korrek TFX wax. For all other paint, I added claybaring (Sonax). I used Sonax' window shampoo as a lube. After washing, washing and washing the clay still picked up A LOT of dirt, so it did its job.
It's nice having a shiny car again!
The hood is especially nice! It has a few stone chips but other than that, it looks great, with the new grille and emblem.
May 8, 2012
Spring Cleaning 2012, Part II
Today, I started using the James May kit I ordered from England last spring, to refresh your memory:

First, tested it on the hidden surfaces of the backseat middle bit which I can take with me inside the house.

Worked fine. Smells reaaaally good!
Cleaner could be more powerful, but meh. I guess it's enough for most home use. I need to get some of the abrasive magic eraser things.
How to use the kit:
The conditioner leaves the usual shiny and oily surface as leather conditioner chemicals often do. After all, the oil is the point. However, this does not seem like snake oil leather cleaner... it actually seems to absorb into the leather, and stops being sticky quite quickly.
The leather feels softer after just the first coat. I usually applied 2 coats of conditioner, so far. My interior has clearly been neglected for years, so it takes some elbow grease to renovate it as well as possible.

I was most careful with the rear passenger compartment. It looks pretty much mint. It's also pretty much the only part of the vehicle that does...
I also treated the front passenger seat. I'm still thinking about what to do with the driver seat and armrest. Re-dye now, or just treat and dye later. I'll probably try the dyeing.

Since I was finally expending energy on the interior, I decided to battle all the dirt and grease that had been absorbed into the cloth all around the car ever since I bought it. This is actually the first time I'm doing a proper interior cleanup. As you've gathered, so far I've been just battling mechanicals, and washing the car.
I used AutoGlym Interior Shampoo. It's easy, just apply shampoo sparingly and rub with cloth.

There's so much accumulated grease I couldn't even get it all off in one go. Need to repeat the procedure tomorrow.


The doors are the most involved place to clean on this car:

For the cloth, I used the AutoGlym Shampoo. For the leather, I used the above Gliptone set. For the hard surfaces, I used AutoGlym Leather Cleaner. Other parts I had done previously; underside with ordinary car wash shampoo, and seals/plastics with AutoGlym Bumper Care.
The doors look pretty good now.
Btw, that pic features the first-aid kit Matyas gifted me a couple of weeks ago!
Remember the anti-theft stickers I had on my door windows? Past pic:

It was finally time for them to go!


I used a couple EURs worth of razor, highly recommended! Just remember to use lots of soap water as a lubricant, otherwise the razor will scratch the window.


Getting rid of the stickers really cleaned up the exterior of the car.
First, tested it on the hidden surfaces of the backseat middle bit which I can take with me inside the house.
Worked fine. Smells reaaaally good!
Cleaner could be more powerful, but meh. I guess it's enough for most home use. I need to get some of the abrasive magic eraser things.
How to use the kit:
- Wipe leather with damp cloth
- Apply cleaner to leather and gently stir with a soft brush
- Let sit for 5 minutes
- Stir with soft brush again and wipe cleaner off with damp cloth
- Let dry for 1 hour
- Apply conditioner with cloth
- Repeat add conditioner if necessary
The conditioner leaves the usual shiny and oily surface as leather conditioner chemicals often do. After all, the oil is the point. However, this does not seem like snake oil leather cleaner... it actually seems to absorb into the leather, and stops being sticky quite quickly.
The leather feels softer after just the first coat. I usually applied 2 coats of conditioner, so far. My interior has clearly been neglected for years, so it takes some elbow grease to renovate it as well as possible.
I was most careful with the rear passenger compartment. It looks pretty much mint. It's also pretty much the only part of the vehicle that does...
I also treated the front passenger seat. I'm still thinking about what to do with the driver seat and armrest. Re-dye now, or just treat and dye later. I'll probably try the dyeing.
Since I was finally expending energy on the interior, I decided to battle all the dirt and grease that had been absorbed into the cloth all around the car ever since I bought it. This is actually the first time I'm doing a proper interior cleanup. As you've gathered, so far I've been just battling mechanicals, and washing the car.
I used AutoGlym Interior Shampoo. It's easy, just apply shampoo sparingly and rub with cloth.
There's so much accumulated grease I couldn't even get it all off in one go. Need to repeat the procedure tomorrow.
The doors are the most involved place to clean on this car:
For the cloth, I used the AutoGlym Shampoo. For the leather, I used the above Gliptone set. For the hard surfaces, I used AutoGlym Leather Cleaner. Other parts I had done previously; underside with ordinary car wash shampoo, and seals/plastics with AutoGlym Bumper Care.
The doors look pretty good now.
Btw, that pic features the first-aid kit Matyas gifted me a couple of weeks ago!
Remember the anti-theft stickers I had on my door windows? Past pic:
It was finally time for them to go!
I used a couple EURs worth of razor, highly recommended! Just remember to use lots of soap water as a lubricant, otherwise the razor will scratch the window.
Getting rid of the stickers really cleaned up the exterior of the car.
Subscribe to:
Posts (Atom)